How to complete a Compensation Plan in Sage People WX and submit it for approval.
Open a Plan
On the Plan start date, the Plan becomes available for you to complete in WX.
To open a Plan, select the relevant Action in WX or the link in the Actions Digest. Alternatively:
- In WX, go to the menu. Select the service hosting the Compensation Planning process.
-
Select the Process Name.
WX displays the list of Plans available to you:

-
Select the Plan Name to display the Plan you want to edit.
Default Plan display in WX
When you open a Plan in WX, Sage People displays the initial view of the Plan you select:

If a direct report is a Planner for their own team, the Plan indicates statuses. This is for the subsidiary, child Plan, and the direct report name is selectable. To display the Child Plan, select the direct report name:

The Plan displays totals at the top of the Plan with Planner fields beneath.
Total fields
| Field | Description |
|---|---|
| Salary Details | Displays above the Plan table for Salary Plans.
Information about the annual budget for your team. The system displays it in the reporting currency for your organization.
|
| Bonus Details | Displays above the Plan table for Bonus Plans.
Information about the bonus budget for your team. Displays in the reporting currency for your organization.
|
Planner fields
The Plan includes default data columns and any columns you add when setting up the Plan. Scroll to the right to see all fields. Columns display in sections:
-
Team
Displays when your Plan includes child Plans for other teams
-
Additional Information
Displays when you set your Plan up with extra, non-default fields
-
Salary
Displays for Salary Plans
-
Bonus
Displays for Bonus Plans
As a Planner, you can modify your view of the Plan. For example, by choosing a subset of the default fields to display on your Plan. This lets you focus on just the data you need for your team. You can also move columns left or right using drag and drop, pin columns in a non-scrolling area, and filter on column content. The full column display restores in the default order each time you close and re-open a Plan. Or when you refresh the page in your browser.
The default Planner fields are:
| Planner field | Description |
|---|---|
| Name | Team Member name. |
The Team fields display for child Plans. Team salary fields only display for Salary Plans. Team bonus fields only display for Bonus Plans.
| Team field | Description |
|---|---|
| Status | Indicates if the child Plan is in progress, submitted, or approved. |
| Annual Team Salary |
Total current salary for the team the child Plan covers. The sum of values for the child Plan and any subsidiary Plans within it. Annual Team Salary includes salaries for all Team Members in the team. This is for those who are eligible for review and those who aren't. |
| Suggested Team Salary | Total salary for the team the child Plan covers after you apply suggested increases. Calculates using the Salary Projection Formula for the Plan. |
| Requested Team Salary | Total salary you request for the team the child Plan covers. The sum of all Requested Salary values you enter for Team Members. Calculates dynamically using figures the Planner enters. |
| Requested Team % | Percentage increase above Annual Team Salary represented by Requested Team Salary. Calculates dynamically using figures entered by the Planner. |
| Balance % | Percentage of Suggested Team Salary left after subtracting Requested Team Salary. |
| Balance | Currency value of the difference between Suggested Team Salary and Requested Team Salary. |
| Suggested Team Bonus | Total bonus for the team the child Plan covers. Calculates using the Bonus Projection formula. |
| Requested Team Bonus | Total bonus you request for the team the child Plan covers. The sum of all Requested Bonus values you enter for Team Members. Calculates dynamically using figures entered by the Planner. |
| Requested Team Bonus % |
Percentage of Suggested Team Bonus represented by Requested Team Bonus. Calculates dynamically using figures you enter. If Suggested Team Bonus is 0 (zero), Requested Team Bonus % also displays 0 (zero). this is regardless of the value of Requested Team Bonus. |
The columns between Team fields and Salary fields display Additional Information fields. You select these in Plan setup.
Salary fields display for Salary Plans.
| Salary field | Description |
|---|---|
| Pay Basis | Time period over which you pay which Current Salary. For example, Year or Hour. |
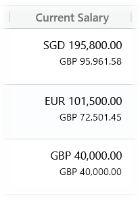
| Current Salary |
Current salary amount. Displays in local and reporting currencies.
Displays for all Team Members. |
| Suggested Salary | Suggested salary amount calculates using the Salary Projection formula. Displays for all Team Members. |
| Suggested Salary % | Suggested salary increase as a percentage of the Team Member's current salary. Calculates using the Salary Projection formula. Displays for all Team Members. |
| Requested Salary |
Salary amount the Planner requests. Open for entry by the Planner if the Team Member is eligible for a salary award. Automatically calculates if the Planner enters a Requested Salary %. Includes local currency and pay basis indicators. When the Planner enters a value, the reporting currency equivalent shows:
Non-eligible Team Members display Not eligible. |
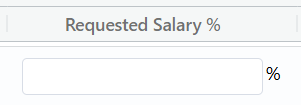
| Requested Salary % |
Requested salary as a percentage of the Team Member's current salary. Open for entry by the Planner if the Team Member is eligible for a salary award. Automatically calculates if the Planner enters a Requested Salary. Non-eligible Team Members display Not eligible. |
| Select Reason | Displays if you set the Plan up to enable Planners to edit the Salary Reason. Displays as a picklist containing all active reasons. |
| Effective Date |
Date when salary awards take effect. Displays if you set the Plan up to let Planners edit the Effective Date. Planners can select the calendar and choose the date the award takes effect.
If left blank for a Team Member, you need to set the Effective Date through the HR Manager portal. |
| Salary Comment |
Link to view or add comments. Use this to add justification notes for significant variance, a Salary Reason change, or an Effective Date change. Displays for all Team Members who are eligible for a salary award. Planners can select the Comment icon to add a note about a Plan entry. The Comment icon displays the number of Salary Comments related to this Plan for the Team Member. |
Bonus fields display for Bonus Plans.
| Bonus fields | Description |
|---|---|
| Months Since Last Paid Bonus |
Number of months from the Team Member's most recent bonus award. Displays for all Team Members who received a bonus award in the past. |
| Last Paid Bonus |
Amount of the Team Member's most recent bonus award. Displays for all Team Members who received a bonus award in the past. |
| Salary | Salary amount you use as the base for calculating the requested bonus award. Calculates using the Base Salary formula for Bonus Calculation. Defaults to the Annual Salary. |
| Suggested Bonus | Suggested bonus amount calculated by the Bonus Projection Formula. |
| Suggested Bonus % |
Percentage of Salary represented by Suggested Bonus. Calculates from the Bonus Projection Formula. Displays for all Team Members who are eligible for a bonus award. |
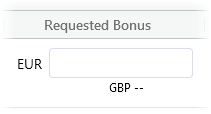
| Requested Bonus |
Bonus amount the Planner requests. Open for entry by the Planner if the Team Member is eligible for a bonus award. Automatically calculates if the Planner enters a Requested Bonus %. Includes a local currency indicator. When the Planner enters a value, the reporting currency equivalent shows:
Non-eligible Team Members display Not eligible. |
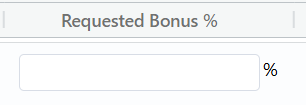
| Requested Bonus % |
Requested bonus as a percentage of Salary. Open for entry by the Planner if the Team Member is eligible for a bonus award. Automatically calculates if the Planner enters a Requested Bonus. Non-eligible Team Members display Not eligible. |
| Effective Date |
Date when bonus awards take effect. Displays if you set the Plan up to let Planners edit the Effective Date. Planners can select the calendar and choose the date the award is to take effect.
If left blank for a Team Member, you need to set the Effective Date through the HR Manager portal. |
| Bonus Comment |
Link to view or add comments. Use this to add justification notes for significant variance, or an Effective Date change. Displays for all Team Members who are eligible for a bonus award. Planners can select the Comment icon to add a note about a Plan entry. The Comment icon displays the number of Bonus Comments related to this Plan for the Team Member. |
Change your Plan view in WX
You can:
- Choose a subset of the Planner fields to display in your Plan using the Choose Columns dialog or by using quick hide
- Resize column widths
- Move columns left or right
- Pin columns so they form part of the non-scrolling area next to the Name column
- Filter on column content for the Salary Requested and Bonus Requested columns
The system retains any changes you make to hide, display, move, or filter columns until you close or refresh the Plan. When you re-open the Plan or refresh the page, the Plan displays without modification.
Choose the columns to display
-
Select Choose Columns:

Compensation Planning displays the Choose Columns dialog:

- By default, all columns display. Deselect those columns you want to hide. You can re-select any you hide in error. If you close and re-open the Plan, all default columns restore to display.
You can also quickly hide a column or section by selecting the column or section heading. Then drag and drop it in the space immediately above the table:


Resize a column
-
Select the column boundary in the heading row:

- Drag left or right.
Move a single column
-
Select the column heading:

- Drag and drop in the new location.
Dragging a column from one section to another, for example Pay Basis from Salary to Team, replicates the section heading:

Move all columns in a section
For example, to move the Bonus section to the left of the Salary section:
-
Select the section heading:

- Keep the cursor in the table heading area while you drag the section heading to its new location.
-
Drop the section in place:

Pin columns in a non-scrolling area
-
Select the column heading for the column you want to pin:
-
Drag the column heading left and drop it immediately left of the Name column boundary:

The newly pinned column includes its section heading.
You can pin multiple columns in the non-scrolling area and move pinned columns left or right within it.
Filter a plan based on column values
For example, to filter the Plan based on the values in the columns for Requested Salary, Requested Salary %, Requested Bonus, or Requested Bonus %:
-
Hover in the column heading to display the Filter icon:

- Select the Filter icon.
-
Compensation Planning displays the Filter by... dialog:

-
Select the Please select field to display your options:

-
Choose the type of filter you want to apply:
- Equal to
- Greater than
- Greater than OR Equal to
- Less than
- Less than OR Equal to
- In the Filter field, enter the value you want to use.
- Select:
- Apply to filter the column
- Reset to clear the dialog so you choose a different filter type or enter a new value for the filter
Handle local and reporting currencies
You can use multiple currencies with Compensation Planning. Typically, you use a reporting currency for centralized administration and financial reporting. Then one or more local currencies for operations and staff compensation in different geographies. The system assigns the reporting currency for your organization an exchange rate of 1.00. You need to define
exchange rates for all currencies you use.
When planning, you display and enter all currency amounts in local currency for each Team Member. The reporting currency equivalent displays beneath:

- The system determines local currency by the currency you configured in a Team Member's current active Salary Record. It can be different for each Team Member. Local currencies display using the same formatting conventions as the reporting currency
-
Team budgets display in reporting currency:

- The system stores currency values with the number of decimal places you hold for the currency
Add comments to Plans
You can add salary and bonus comments to each row on a Plan in WX. You can use comments to add:
-
Justification notes for a requested salary or bonus award deviating significantly from a suggested value for a Team Member
-
Explanation for a change to the reason for an award
-
Explanation for a change to an effective date
-
Select the Salary Comment icon or the Bonus Comment icon for the Team Member:


Sage Peopledisplays the Comments dialog:

-
Enter your comment.
-
Select Submit.
The Comment icon changes to show the number of comments:

View existing comments
To view existing comments or to add more, typically as a response to an existing comment, select the Comment icon. This displays the Comments dialog:

Use the keyboard to edit a Plan
You can use your keyboard to move around and edit a Plan worksheet:
| Action | Shortcut |
|---|---|
|
Moving between fields |
Tab or cursor keys to move forwards. Shift + Tab or cursor keys to move backwards. |
|
Selecting a field |
Enter or Space bar. |
|
Expanding a picklist |
When you select this, Enter or Space bar. |
|
Moving up and down a picklist |
Cursor keys. |
|
Selecting an item in a picklist |
Enter |
|
Opening a dialog box Example: Comments |
Enter or Space bar. |
|
Moving between fields in a dialog box |
Tab |
| Closing a dialog box without editing | Esc |
Completing and submitting Plans
Team Members who are eligible for salary or bonus awards have open fields for Requested Salary and Requested Bonus. Work through the Plan, entering currency values in the Requested Salary or Requested Bonus fields. Or percentages in the Requested Salary % or Requested Bonus % fields.
- Enter your requested salary or bonus award amount or percentage values for eligible Team Members.
You can't edit grayed rows.
- Green indicates your requested amount is equal to, or lower than, the suggested amount
Red indicates your requested amount is greater than the suggested amount. (If the suggested value is zero, entering a requested value of greater than zero doesn't display with a red background)
- The Requested total value updates dynamically
- When you complete your Plan, select Submit and Submit.
- You can't edit a submitted Plan
- If your Plan includes child Plans, their Planners must submit them all before you can submit your Plan
- The Plan Status changes to Submitted on the Compensation Planning Home page